Friday, August 30, 2013

Ring Slings. Love Them or Hate Them?

Alright, so I got the idea for title of this post from one of my local babywearing leaders. She makes me laugh. She buys ring slings and within two weeks will sell them because she doesn't like them. But I have to get her credit for continuing to try.

Anatomy of a Ring Sling

Ring slings are great for quick in and out carries, and can be used from newborn to toddlerhood. Ring slings are basically a piece of fabric between 65 and 80 inches (typically) with rings sewn into one end. There are about as many styles of sling shoulders as there are sling makers. The most popular are pleated (Sleeping Baby Productions' knife pleats are by far the most popular), gathered, eetsi (a hybrid of pleated and gathered), and Highland box pleat (like the ones done by Oscha). Most slings are made with high quality rings made by a company called SlingRings. These are tested up to like 200 lbs, and are all one piece of either aluminum or nylon, so there is nothing to snag the sling or scratch baby. You thread the loose end of the sling (or tail) through the rings like a buckle, and then slip it over your shoulder so that it drapes similar to a beauty pageant ribbon. You then slide baby into the cradle formed at your hip, and pull it tight. The tension of the baby's weight in the sling prevents the fabric from sliding back out of the rings. Ring slings are great because they can adjust easily for different sizes of wearers and or babies.

Below are some pictures of different types of shoulders and different ring slings. I've also linked a video I did explaining how to use a ring sling (sorry, this was before my hubby made me an awesome place to do videos, but it's pretty decent).

Ring Sling video:
http://www.youtube.com/watch?v=406FlDMsWgg


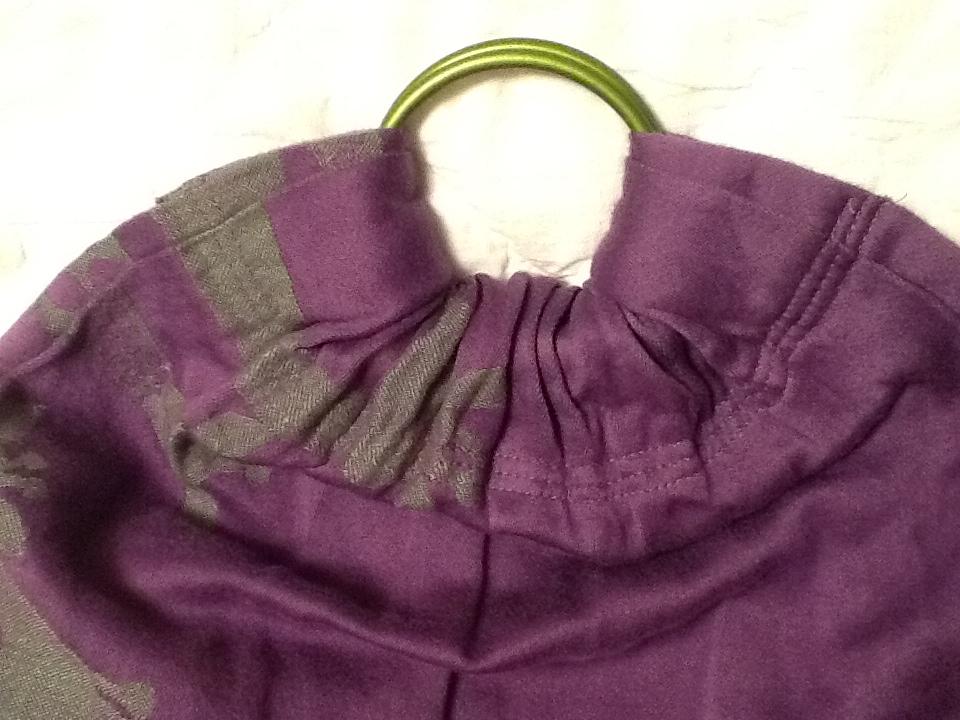
This is an eetsi shoulder. This is the hybrid shoulder: there are two small pleats on either end, and then it's gathered in the middle. It spreads out fairly well when you're wearing it, but doesn't go as far as the gathered.

This is a gathered shoulder. The fabric is pulled through the rings and then sewn without any pleating. This allows the shoulder to spread out nice and wide...great for daddies because it can accommodate their larger frames well.


Here are a couple examples of the knife pleat shoulders, similar to those done by Sleeping Baby Productions (SBP). Note how the pleats are the same size and evenly spaced across the rings. This shoulder tends to spread out a lot less than either the eetsi or the gathered shoulder, and is a favorite for mamas with smaller frames for that reason.

Friday, August 23, 2013

Let's Talk about Mei Tais for a Minute

So most of my posts so far have been regarding woven wraps. I know that not everyone has a woven wrap, so let's jump into a different type of carrier. Mei Tais are Chinese in origin. A basic translation: mei=to wear on the shoulder, tai=band or strap. A mei tai then is basically a squarish-shaped panel with straps that go over your shoulder and a second set of straps that go round your waist. There are padded straps, unpadded straps, and wrap style straps out there. The panel itself can be a solid color, or have a decorative panel on it. A lot of mamas like mei tais that have been converted from woven wraps. They can also be made of any good bottom weight material such as duckcloth or denim. I prefer the wrap conversions personally because they seem to breathe better. I do like my Infantino though, and use it as the "keep it in the car for major meltdown, mommy forgot the wrap" or "oh crap, it's an unexpected rainshower" moments. Mei tais are great for babies of a lot of different ages and sizes. I started using one with my youngest when he was about 4 weeks old. I can use it with my 32 lb 3 year old as well.
A mei tai can be used for a front, hip or back carry. There are different ways to tie your straps off, but the most common is to tie the waist straps around your waist. Put baby in the carrier, and pull the panel up between his legs and over his back. Wrap the shoulder straps over your shoulders to your back, and cross them in an "x" pattern. Bring the shoulder straps back around just above your hips and around baby's back. You can simply cross them behind baby and bring them back around under his legs to your back and knot them. That's for a front carry. You do basically the same thing for either a hip or a back carry. With back carries however, you can tie off with a ring, tie Tibetan, or tie with ruckstraps similar to a woven wrap. Hopefully the pictures below will help explain what I mean.

This was my first Mei Tai...one I made myself. Not the greatest,
as I made the panel too big for baby L, but it worked.

Here I've got my then 25lb toddler in the back with my baby in the front in a Moby wrap.

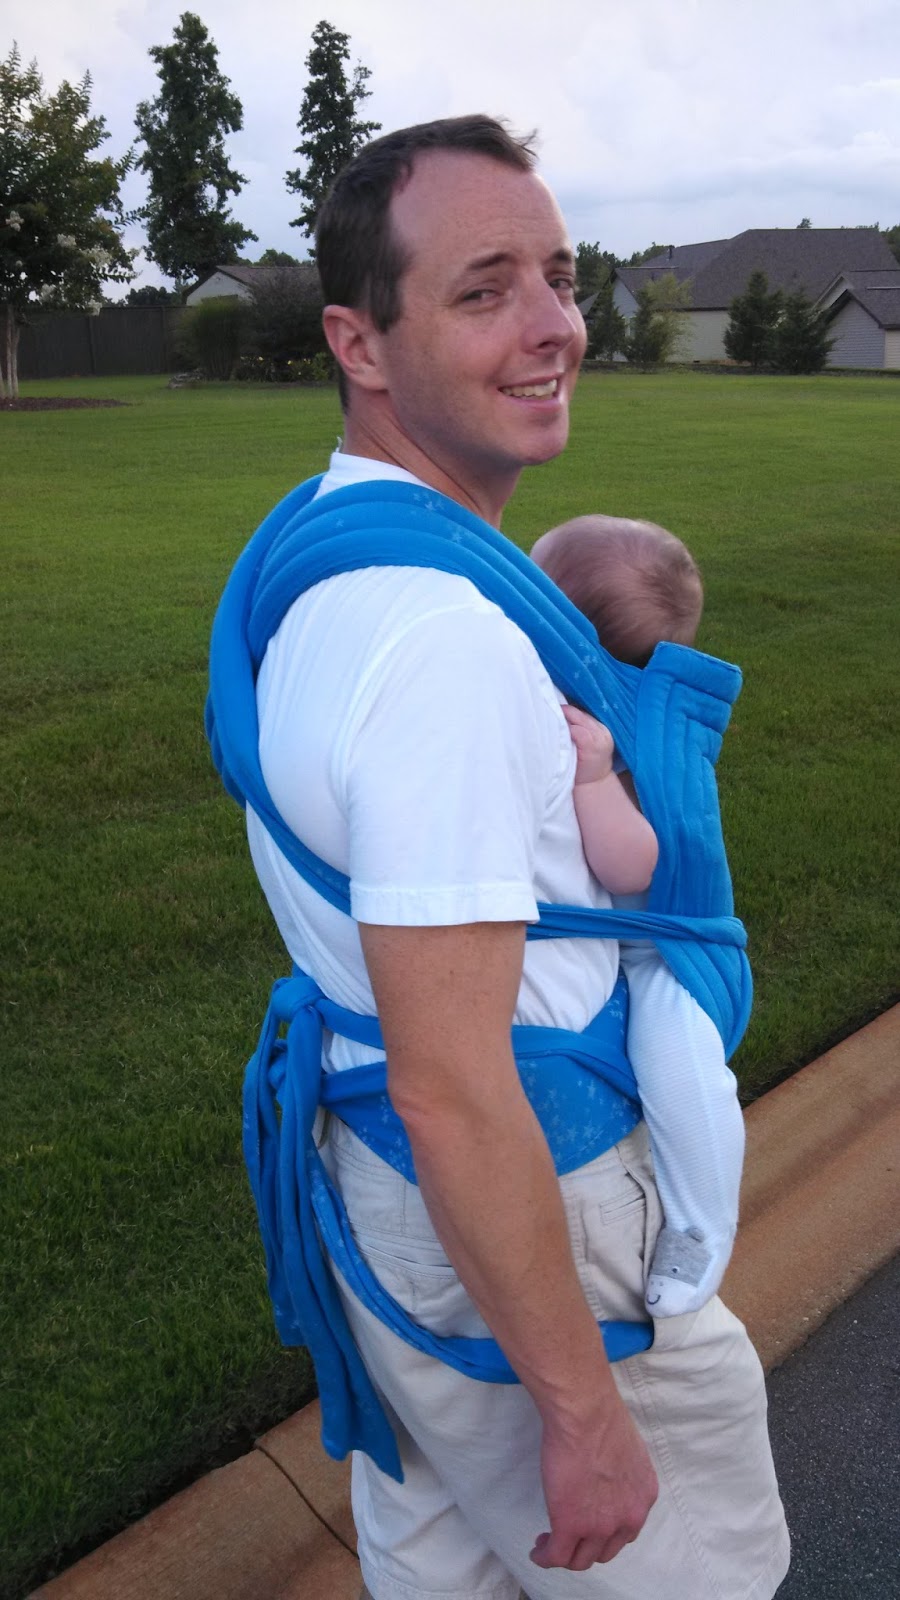
And hubby, modeling the toddler carry again. Here you can see the way the straps go round C's back in what is called a Lexi twist. Basically, they wrap around a couple times before going under his legs.

And this is what's called a wrap conversion Mei Tai. It's made from a woven wrap, in this case a Didymos Iris...this one was actually made by Didymos. They call it their DidyTai. I liked it as far as construction, but it was too small in my opinion for bigger babies or toddlers. 

My second attempt at a mei tai, this time with wrap straps.

Good example of a different tie off. Since I hate ruck straps, I was experimenting with using a sling ring.

Another wrap conversion mei tai, this time a Natibaby Milky Way. This one was also made by Natibaby. You can see that they put a bit of padding at the top, near the legs, and also in the straps and waistband.

Hubby babywearing. He's so hot!

You can see how this panel is almost too tall for L. You can fix that
by simply rolling the waistband under to adjust the height. 

The next two pictures are of mei tais laid out. You'll notice that both sets of shoulder straps are attached at an angle to the body panel. This makes it a little easier to get the correct positioning. The one on top has a sleep hood attached, the one on the bottom does not.


This is an older style Infantino mei tai with a taller body panel. This is a great example of a mei tai that is relatively inexpensive, but will last you through toddlerhood. I think this one is in the neighborhood of $30.

Oh, another wrap conversion. This one was done by a WAHM from Natibaby Rivea.
I believe it was done by Chrysalis Designs. It has wrap straps and a sleep hood as well.

 And now, a couple good examples of a back, hip, and front carries in a mei tai that show how versatile a mei tai is. I actually took all three of these within 5 minutes. I did not actually take L down to change the carry. I just untied the shoulder straps and shifted him around in the carrier. Quite convenient if you've been wearing for awhile, and need to change it up for comfort. I also like the mei tai because it's great for quick in and out carries because you don't have a lot of excess wrap to contend with in a parking lot.

Back Carry: don't mind L's face; he's quite happy...almost asleep.

Hip Carry: photo credit goes to my toddler.

And finally, a Front Carry: I can also nurse in this position,
although it's getting a little tougher because L is getting taller.

Friday, August 16, 2013

Back Carries. How do I get a good seat?

So you've decided to be brave and venture into the world of back carries. The only problem? Your little one is going for the gold medal in Olympic seat popping! Seriously, kid? Can you just not straighten your legs, not pull my hair out, not spit up on my hair, and be patient while I tie us up in a knot? Please? At least, that's what I used to think whenever I tried to get my youngest up on my back. We've since learned a few tricks and come to an understanding on how to get him up there. So read on, and I'll give you a few tips (thanks to the awesome mamas who chimed in and helped me out). These tips can be used for woven wraps, mei tais, and structured carriers. Some are obviously specific to woven wraps...

There are a variety of ways to get Baby up on your back. I'll just name a few, and then I've got some pictures of a couple that I'll post below.

1) Santa Toss: wrap your wrap around baby's shoulders, grab the rails in front of him, and toss him up and over your shoulder just like you see all the pictures of Jolly Old St. Nick doing with toys.
2) Hip Scoot: Put baby on your hip, duck him under your arm, and scoot him around...it helps if you lean towards the opposite side from baby as you scoot him around. This works especially well for toddlers who may be a little too heavy to Santa.
3) Superman: Again, wrap your wrap around baby's shoulders. Grab his arms and the wrap, and swing him up and over your shoulder so he settles on your back.

The most important thing to remember about back carries (or any carry for that matter): NEVER take your hand off baby! Always keep one hand on baby until you are done wrapping/tying/fastening. That way baby doesn't fall. I also recommend that you start out practicing with a spotter, or over a bed or other soft surface...just in case!

Here's some pictures of the Superman used to get my 9 month old up for a Double Hammock with Saltwater Variation:

Lay your wrap out flat and find the middle marker.

Place baby on the wrap with the middle marker right between his shoulder blades. 

Grab the bottom edge of your wrap, and pull it up between his legs.

Tuck it in the waistband of his pants, making sure you're spreading it all the way knee to knee.

Sit baby up, and pull the top rail up and over his shoulders.

Do a funky twist (sorry, no idea how to explain that in words, but hopefully you'll get it from the pictures) and grab both baby's arms and the wrap at the same time.

Pick baby up and swing him over your shoulder...

and on to your back. Notice how the wrap stayed in place, creating the seat.
When you start pulling stuff tight, pull it snug but don't overtighten. You'll pop the seat every time. 

And for those of you who are not at home with a nice clean floor to spread your wrap out on:
Find your middle marker.

Put it in the center of your chest, and wrap around to the center of your back.

Hang on to that spot

This is where you'll start your wrap on baby's shoulders.

Up we go. I used the same technique as above, but this time the wrap is not tucked in his pants. 

Holding on, adjust your wrap so it's going knee to knee.

Reach up between baby's legs and grab your bottom rail.

Spreading it knee to knee, pull out slightly away from you...

and tuck it under his bum so that you have fabric sandwiched between your bodies. 

This is where you pull it snug, but not super tight. 

Pass your tail under your arm, and across your chest, going over the second rail.
The middle marker should now be in the center of your chest,
and your second rail is secured between your knees to maintain tension.

Pull the first rail under your other arm, and kind of spread it out.

Go up and over your shoulder, making sure that it is nice and high on baby too.
See how it goes all the way up to his neck and over his shoulder?

Now, make a second seat, same way as the first. Make sure it's going knee to knee.

First rail goes over your shoulder, and pull it snug.

Double check that baby is not pulling your hair. ;)

Reach under the second tail, and grab the first tail. 

Pull it all the way through. 

Now, you're going to crisscross your tails in the center of your chest.

And pull your tails back to make your wiggle proof pass.

Here I'm doing both tails at one time; you can do it one at a time,
just secure the tail you're not working with between your knees. 

Pull your tails around in front and get ready to knot
(pardon the facial expression...we work with what we've got!).


Still having trouble your seat? Okay, here's a guaranteed win. You'll probably need at least a 6 to do this variation, although I personally prefer a 7. This is the Double Hammock Unpoppable Seat Variation.

Find your middle marker, and put it on your shoulder. Spread your wrap out in front...

and in back.

Up goes baby. You can balance using your knee to support baby while you get your hands in position. 

Super baby!

And he's up. Notice that the wrap is now across my back and between me and baby. 

 Grab the rails between baby's legs.

And pull your tail up and over baby's shoulder.

Make sure you've got it knee to knee. (Again, notice I've got my hand on baby's bum to support him.) 

Pull the tail over your shoulder and secure between your knees. 

Now you've got tails over each shoulder.

Take your second tail, and pass it under your arm

Spread it out to make a nice chest pass.

And thread it under your second tail. Again, middle marker should be about in the center of your chest. 

Pull it all the way through.
(Okay, so this is an obvious step; I just loved the picture because it looks so cool!)

Get your chest pass nice and tight. Start at the top rail, pull it tight.
Then do the center, and then the bottom. With this carry, you don't have to worry about popping the seat...but still don't overtighten so you don't cut off circulation to baby's legs. 

Pass your rail under your arm and let it spread out.

Pull it up nice and high (baby is not going anywhere at this point as long as you
keep tension on your second tail, which is still between your legs.)

Pull your tail up and over baby

Check your seat. Spread this tail out knee to knee as well. 

And the famous "L" pull. The tail you just wrapped around goes out to the side. The second tail goes straight up. Give a little bounce, and pull. This helps ensure your chest pass is nice and tight. 

Tighten. 

Both tails are now over your shoulders.

Pass one tail at a time behind you

going over baby's first leg, 

and under the second leg.

Grab your second tail and pull tight one more time.

Make your wiggle proof pass...over the first leg,

under the second leg.

And knot it off. This is a size 7 wrap, so I have plenty of tail to tie with. If you use a 6, you'll have less tail.

Double check baby's face is not covered.

And here, I'm pointing out that his knee is higher than his bum, and also checking that my passes aren't too tight. His leg should be able to move and shouldn't be stuck in an uncomfortable position. 

Photo credit: Jessica Mitchell.